How to improve the cooling efficiency of a racing car? The answer begins with measured heat flow, not a larger radiator. SAE International’s technical literature on vehicle thermal management treats heat rejection, airflow, and pressure loss as connected design variables. A radiator can dissipate substantial heat, yet still perform poorly if air bypasses its core or exits the engine bay slowly. Small details matter: sealed duct edges, clean fins, secure hoses, and a clear outlet path.
Track data makes the problem tangible. Log coolant and oil temperatures, ambient conditions, vehicle speed, and fan operation during repeatable sessions. Compare readings across laps, not just peak values. FIA technical regulations also show why cooling changes must be considered alongside bodywork and aerodynamic constraints; the rules vary by category and season, so teams should check the current regulations for their series.
Race engineer Carroll Smith’s practical maxim, “The tires are the only part of the car that touch the ground,” is not about radiators, but it reflects a useful discipline: focus on what the car actually does. For cooling, that means validating airflow and temperatures on track rather than trusting a tidy workshop setup. A limitation remains: one successful duct layout may fail on another chassis. Cooling is a compromise. More opening can mean more drag, and sometimes the first fix is simply better sealing.
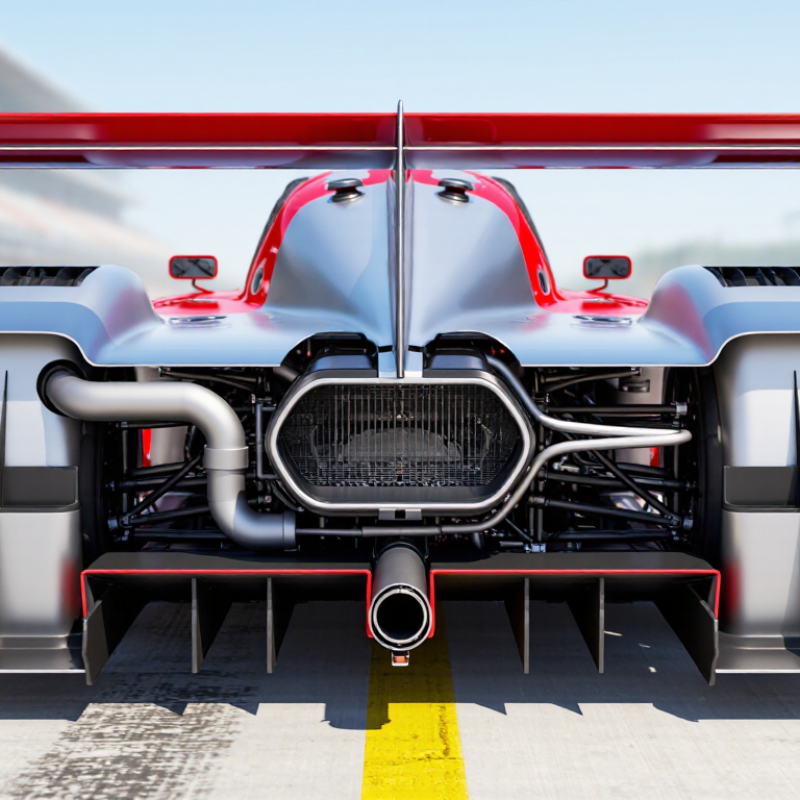
Cooling efficiency starts with measurement, not a larger radiator. Estimate engine power, ambient temperature, track speed, and session length. An endurance car faces a different thermal load than a sprint car. Record coolant, oil, intake-air, brake, and transmission temperatures during representative laps. Place sensors near each heat source, because outlet readings can hide local spikes. During track testing, I compare steady temperatures with post-lap peaks. Both matter. A calm gauge may miss a brief rise toward a dangerous operating limit.
Map heat sources before changing ducting or fan settings. Combustion creates the main engine load, while exhaust parts can radiate intense heat into nearby plumbing. Brakes add heat around the wheel area, and transmission oil can warm the same airflow path. Inspect heat shields, seals, and underbody panels for gaps or damage. Thermal imaging can reveal hot zones that ordinary gauges miss. Airflow testing should check pressure before and after the radiator, not only the fan speed. High pressure at the inlet is useless if air escapes around the core.
Coolant temperature may be acceptable while oil temperature continues climbing. That result deserves investigation. I once treated a hot engine bay as a radiator problem, but poor extraction was the real issue. The lesson is imperfect: track data can mislead when sensors are poorly positioned. Repeat tests under similar conditions, label every measurement, and question convenient explanations. Small details matter.
Racing car cooling often depends on air management, not a larger radiator. During track testing, a narrow inlet can create high pressure ahead of the radiator. However, air may escape around its sides instead of passing through the core. Seal the radiator to its duct with durable panels and flexible edging. Every gap matters.
The inlet should face clean, undisturbed air. Keep its opening free from suspension parts, cables, and sharp internal bends. A smooth duct guides air toward the radiator without sudden expansion. Behind the core, provide a clear exit path. Hot air needs somewhere to go. Vents in the bonnet or inner wheel area can reduce pressure behind the radiator, but their position requires testing. A vent placed in a high-pressure zone may worsen airflow.
Measure coolant temperature, inlet temperature, and outlet temperature during repeated laps. Use sensors in consistent locations. A temperature drop across the radiator can reveal useful information, but it does not tell the whole story. Pressure taps before and after the core provide stronger evidence. I have seen drivers blame the radiator when the real problem was trapped air in the engine bay. That assumption is easy, and sometimes wrong.
Inspect the duct seals after each event. Look for melted edges, loose fasteners, and rubber dust. Small failures grow quickly under heat and vibration. Computational airflow studies can help, yet track data remains essential. Wind direction, traffic, and changing speeds can expose weaknesses that workshop testing misses.
Racing car cooling starts with the radiator’s size, core design, and airflow path. A larger radiator is not always better. Excessive thickness can restrict air and add unnecessary weight. Select a core that matches engine output, available space, and expected ambient temperature. During testing, record coolant temperature at the radiator inlet and outlet. A 10–15°C difference may indicate useful heat transfer, but airflow still needs inspection. I once chose a thicker core that looked impressive, yet the engine ran hotter in traffic.
Fans should support airflow when vehicle speed is low, especially after a slow corner or during pit work. Use a sealed shroud so the fan pulls air through the entire core. Position the fan on the outlet side when possible, leaving enough clearance around the blades. Confirm its rated airflow under real electrical voltage, not only laboratory conditions. More airflow helps, but poor ducting can waste it. Check current draw, wiring temperature, and fuse capacity before track use.
Coolant choice affects heat transfer, boiling protection, corrosion control, and service intervals. A water-based mixture can transfer heat effectively in suitable conditions, while glycol improves freeze and boil protection. Follow the engine builder’s specifications and use the correct corrosion inhibitor. Bleed trapped air carefully; one small bubble near the thermostat can cause unstable temperature readings. Recheck hose clamps, the pressure cap, and coolant level after every session. Small oversights matter.
Representative coolant properties at approximately 20°C by ethylene-glycol concentration
Water provides the highest specific heat capacity and thermal conductivity, while increasing ethylene-glycol concentration improves freeze and corrosion protection but reduces heat-transfer performance. A commonly used 50/50 mixture is a practical compromise. Radiator core size, unobstructed airflow, fan control, duct sealing, and coolant selection should be matched to the vehicle’s heat load and operating conditions.
Racing-car cooling should protect sensitive parts, not only lower coolant temperature. The U.S. Department of Energy reports that coolant can carry roughly 30% of an engine’s fuel energy as waste heat. That load quickly reaches wiring, sensors, lubricants, and intake components. In track testing, a reflective heat shield near the exhaust manifold can reduce radiant heat exposure substantially. However, shielding alone may trap hot air. I have seen cooler panels fail because the engine bay lacked an exit path.
Reduce heat transfer with distance, airflow, and selective insulation. Separate exhaust routes from electronic control units and fuel lines. Use sealed ducts to feed cool air directly to the radiator, brakes, and intake. SAE technical literature commonly records under-hood temperatures above 120°C in severe operation. A small air gap behind a shield can slow conduction, while ceramic-coated exhaust surfaces can reduce radiated heat. These solutions need validation, not assumptions. A lighter shield may crack after repeated vibration.
Tips: Measure surface temperatures before changing parts. Place sensors near wiring, fluid reservoirs, and intake walls. The FIA’s motorsport safety guidance emphasizes secure routing and thermal protection around high-temperature systems. Check airflow with smoke testing or wool tufts. Keep radiator exits clear. Review data after every session, because a five-degree improvement at low speed may disappear during following traffic. One overlooked issue is heat soak after shutdown; fans and vents should manage that period without exhausting battery capacity.
A temperature gauge is useful, but it can hide brief spikes under acceleration or after a hot pit stop. Log coolant and oil temperatures each lap, alongside ambient temperature and session length. Compare readings from similar conditions; a rising trend matters more than one isolated number. Set warning limits from the engine builder’s specifications, not a generic dashboard color. Keep a written baseline. It helps when memory gets fuzzy.
Maintenance affects what the sensors reveal. Before each event, check coolant level, hose softness, clamp movement, radiator fins, and the pressure-cap seal. After a session, inspect for dried coolant marks and debris packed into the core. ASHRAE Handbook—Fundamentals property tables put a 50% by-volume ethylene-glycol mixture’s specific heat near 3.3 kJ/kg·K around room temperature, below water’s roughly 4.18. That difference can matter when choosing coolant for a particular setup; follow the engine and coolant specifications. I have seen clean fins overlooked because the reservoir looked full. Not a perfect inspection. Record coolant type, service date, and any temperature excursions, then review the notes before the next run.
High pressure can build ahead of the radiator, while air escapes around its sides. Seal gaps with durable panels and flexible edging. Every gap matters.
Face the inlet toward clean air. Keep cables and suspension parts out of the opening. Smooth duct walls guide air without sharp bends.
Give air behind the radiator a clear exit. Bonnet or inner-wheel vents may help, but their position needs testing. Not always.
Log coolant, inlet, and outlet temperatures in consistent locations. Pressure readings before and after the core can reveal more. One temperature drop cannot explain everything.
Keep exhaust heat away from wiring, sensors, fluid lines, and intake parts. An air gap behind a shield can slow heat transfer. I would still check for trapped hot air.
Check coolant level, hoses, clamps, radiator fins, and the pressure-cap seal. After running, look for dried coolant and debris packed into the core. A full reservoir can mislead; I have trusted it too much.
Compare similar sessions, including ambient temperature and session length. A rising trend matters more than one isolated spike. Keep a written baseline; memory gets fuzzy.
Heat can soak into nearby parts after the engine stops. Fans and vents may help, but they should not drain the battery. I might overlook this after a busy session.
How to improve the cooling efficiency of a racing car? Begin by assessing the engine’s cooling requirements and identifying every major heat source, including the engine, exhaust system, transmission, and brakes. This makes it easier to determine the required cooling capacity and prevent heat from accumulating in the engine bay. Airflow should then be optimized by guiding fresh air efficiently through the radiator, sealing unwanted gaps, and providing a clear path for hot air to escape. Careful attention to ducting, airflow balance, and radiator placement can significantly improve performance.
The cooling system should use a properly sized radiator, suitable fans, and coolant selected for the car’s operating conditions. Heat shields and insulation can reduce heat transfer to sensitive components, wiring, and intake systems. Finally, temperature sensors should monitor coolant, oil, and other critical areas during testing and competition. Regular checks for leaks, blocked passages, damaged hoses, and coolant deterioration will help maintain stable temperatures and reliable cooling efficiency.

Rock Auto